Students in Mrs. Priscilla Englert’s Automotive class recently completed a project where they used a 3D Computer CAD Design program to reverse engineering an oil filter and wrench. The students then used a 3D printer in the Library to print the objects. Read about the details of the project below:
3D Printing Project
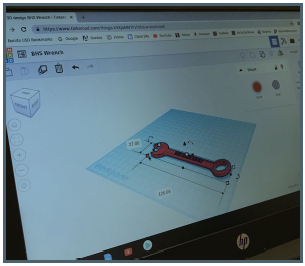
CAD Design: Students use Tinkercad software program on a Chromebook laptop computer with an external mouse for ease of use and manipulation of the design. They start by completing 4-6 Tinkercad tutorials, learning about the different features, dimensioning, views, etc. and start designing right away. This allows them to quickly operate the software and practice designing before they go on to their own projects.
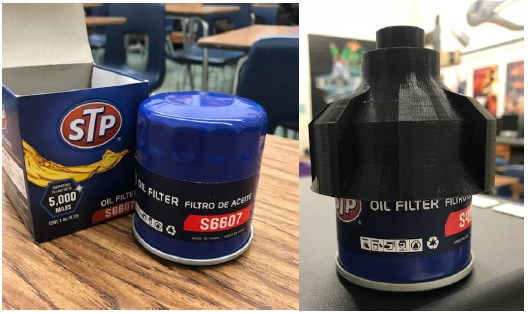
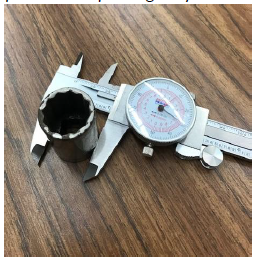
Reverse Engineering: Students learn how to use a dial caliper in inches and in millimeters so they can interchange the unit of measurements whenever necessary. Their designs on CAD must be fully dimensioned in MM. This allows them to pay attention to details when measuring a part/product for dimensions. Once they have all the dimensions they think they will need for the CAD design, they then have the opportunity to go back to the part/product, with a caliper, and re-measure features they may have missed or features on dimensions that just do not match up on CAD. This is all part of the full design process when dealing with a known “good” part and exploring ways to customize it or improve upon a design.
STL File to a G-Code File: Once the students complete their designs, they then use software programs Craftware and Tinkercad to produce the proper file that the CraftBot 2 3D printer can read in order to create the finished 3D printed part. Craftware will change the STL file to a G-code, which can be manipulated, to a certain degree, to produce a successful print. It is during this process that the student may find out that his/her intentional design may not function correctly as a print. The student can then redesign or manipulate the G-code in order to create a 3D printed part.
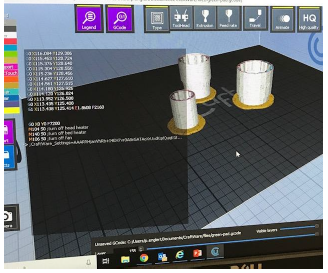
3D Printer: The final step is to bring their designs to life! The CraftBot 2 is a novice/hobbyist printer that has its limitations but has worked great for our classroom projects. The students have learned to manipulate their designs so that the printer can understand it and create a successful print. We all know that what looks “good” on paper/screen may not translate over to the “real-world.” That is all part of the learning, adapting, and problem solving and trial-and-error process of good engineering.
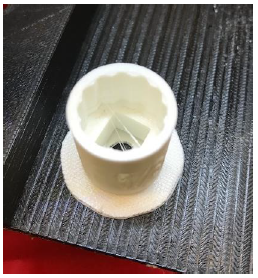
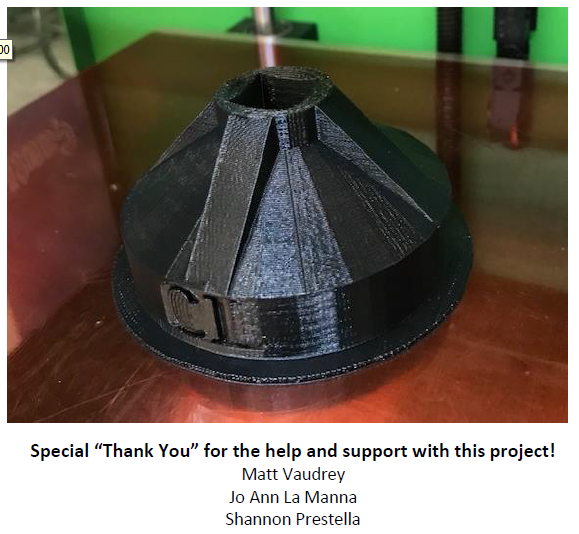
Final Project: The students have a final project where they take an oil filter, reverse engineering for specific dimensions, create a hand-drawn concept, then create a 3D model of an oil filter wrench, and finally print it on the CraftBot 2. This oil filter wrench can be used to remove or install their own oil filters when completing an oil change on their cars.